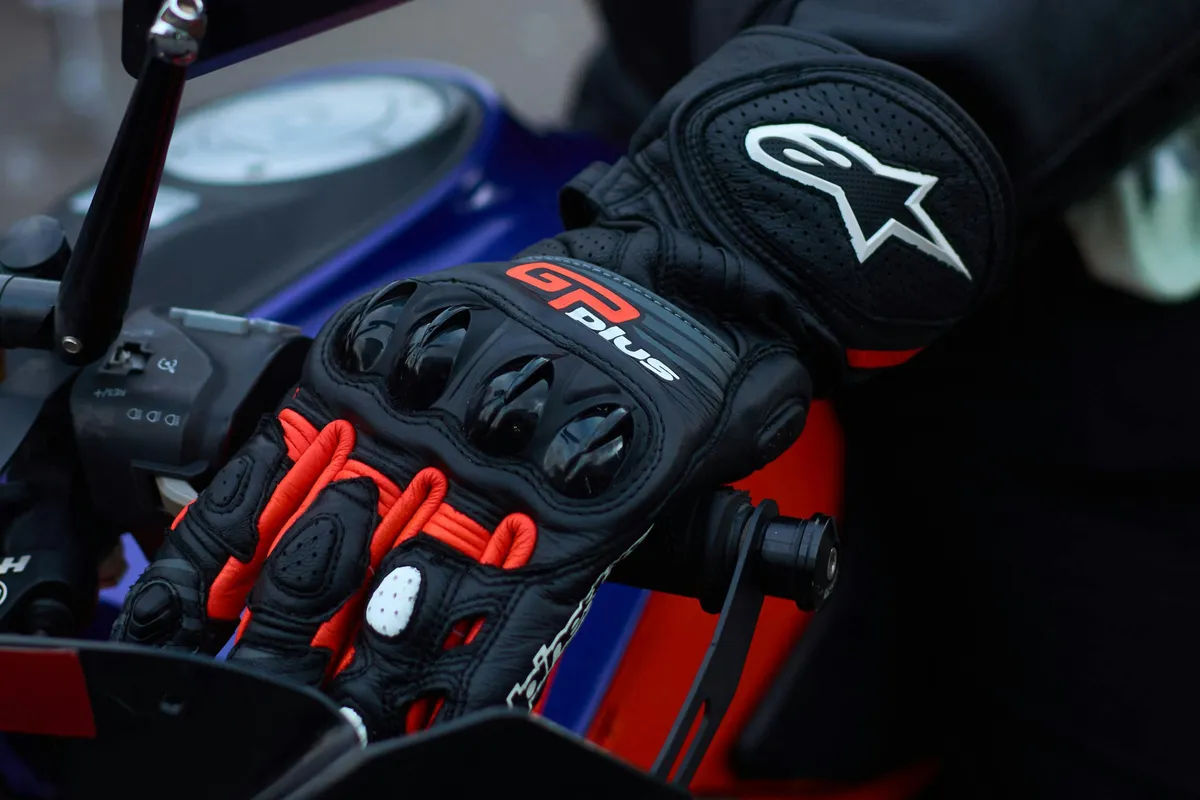
Beginner Motorcycle Gear: Complete Guide
Essential motorcycle gear for new riders. Complete protection on a budget with our beginner-friendly buying guide and recommendations.

Obsessive researcher who reads every Reddit thread and expert review so you don't have to. Years of research behind every guide.
Looking for more gear recommendations?
Browse All GuidesThere is a single sentence that changes more riders' lives than any other piece of advice, and it is this: All The Gear, All The Time. Get geared up properly from your first ride and you stop fearing the road and start enjoying it, because you know that the low-speed tip-over in a parking lot or the gravel surprise on a back road ends with a story instead of a hospital bill. Building a full kit as a new rider feels expensive and confusing, but it does not have to be either, and you can get fully protected on a sensible budget without cutting a single safety corner. The piece to buy first, before anything else, is a properly certified helmet, and the smartest starting point for most new American riders is the HJC i10: a DOT and Snell M2020 certified full-face lid at a budget price. Let me walk you through the whole kit, in the order you should buy it.
I earn a small commission if you buy through links on this page, at no extra cost to you. As an Amazon Associate, we earn from qualifying purchases. I only point riders toward gear I would be happy to wear myself.
In a Rush? Buy the helmet first. Get the HJC i10, a full-face lid carrying both DOT and Snell M2020 certification for a budget price. Then add a CE-armored all-season jacket like the Joe Rocket Atomic 5.0, summer gloves like the RST Urban Air 3, walkable boots like the Alpinestars Faster-3, and finally riding pants. Buy in that order, certify every piece, and you have a full ATGATT kit without overspending.
| Best For | Product | Why This One |
|---|---|---|
| Start Here (Helmet) | HJC i10 | DOT and Snell M2020 certified full-face protection at a genuine budget price |
| Best Beginner Jacket | Joe Rocket Atomic 5.0 | CE-armored, all-season textile that grows with a new rider through every condition |
| First Gloves | RST Urban Air 3 | Real CE-rated summer protection and decent airflow without spending much |
How I Picked These: A lot of riding experience teaches you that new riders make the same two mistakes: they either skip gear to save money and ride exposed, or they panic-buy expensive kit they do not need yet. This kit threads that needle. I lean on owner reports, the consensus across rider communities, and the actual certification details (DOT, Snell M2020, CE EN 13594, CE EN 17092, CE EN 1621, and CE EN 13634) rather than a marketing line about premium protection. I have not crash-tested any of this on a slide rig, and you should be skeptical of any roundup that claims it did for a list like this. What I weigh is whether the protection is genuinely certified, whether each piece is comfortable enough that a new rider will actually wear it on every ride, and whether the whole kit comes together at a price that does not force anyone to choose between safety and rent. A jacket in the closet protects nothing.
What ATGATT Actually Means, and Why It Is Not Negotiable: All The Gear, All The Time is the idea that you wear full protective gear on every ride, not just the long ones. It is the single habit that separates riders who walk away from crashes from those who do not. The reason it matters so much for new riders is that most crashes happen close to home, at low speed, in the first months of riding, exactly the rides where the temptation to skip gear is strongest. The classic line is "dress for the slide, not the ride," and it holds up. Asphalt does not care that you were only going to the store. A 30 mile per hour slide across pavement will grind through denim and skin in seconds, and your body weighs the same whether you crash on a highway or a residential street. The whole point of this guide is that ATGATT does not require a fortune. It requires buying the right pieces in the right order and certifying each one, which is exactly what the rest of this is about.
The Order to Buy In, and Why It Matters: Money is finite, especially when you have just bought a bike, so the order you buy gear in is a real decision. Here is the priority, and the logic behind it. Helmet first, always, because your head is the one part of you that you cannot heal or replace, and a head injury changes everything in a way a broken wrist does not. Jacket second, because your torso, spine, and arms have the largest surface area to grind and the most to protect, and a good armored jacket covers shoulders, elbows, and back. Gloves third, because your hands hit the ground first in almost every fall and a glove is cheap insurance against losing skin and breaking the small bones in your hand and wrist. Boots fourth, because ankles are weirdly exposed and a 400-pound bike landing on a sneaker does real damage. Riding pants last, not because legs do not matter, but because most new riders start in proper riding jeans or armored textile pants and this is the piece people most often phase in after the first four are sorted. Buy in this order and at every step you have spent your money where it protects the most.
Start Here: The HJC i10 Helmet
Your helmet is the single most important purchase you will make as a new rider, and the good news is you do not have to spend a premium-tier amount to get genuine protection. The HJC i10 is the lid I point most new riders toward because it carries both DOT and Snell M2020 certification at a budget price, which is a rare combination at this end of the market. It is a full-face helmet, which is the style I recommend without hesitation for new riders because it protects your chin and jaw, an area that takes a significant share of impacts in real crashes and that open-face and modular helmets leave more exposed.
Who it is for: the new rider who wants a properly certified full-face helmet without spending a premium-tier amount, and who would rather put the savings toward the rest of the kit. The detail you only learn from owners is that the i10 fits a fairly neutral, slightly rounder head shape, so it suits a broad range of riders, and the cheek pads break in after a few rides to a comfortable snug fit. The honest limitation: at this price the visor is not the optically perfect glass of a premium lid, wind noise is a touch higher than on expensive helmets, and the venting is adequate rather than exceptional. None of that compromises the protection, which is the whole point. For a first helmet, this is genuinely hard to beat. If your budget later allows, my best motorcycle helmets guide covers the step-up options, and the best helmets under 300 guide digs deeper into the value tier.
HJC i10
HJC
A genuine budget standout: full DOT and Snell M2020 certification for around $140. Polycarbonate shell, Pinlock-ready shield, and ...
Check Price on Amazon →Your Jacket: Joe Rocket Atomic 5.0
Once your head is sorted, your torso is the next priority, and a good armored jacket protects the largest area of your body. If you are not sure whether to go textile or leather for your first jacket, the textile vs leather jacket guide lays out the tradeoff. The Joe Rocket Atomic 5.0 is the jacket I recommend most often to new riders because it gets the fundamentals right at a beginner-friendly price. It is an all-season textile jacket with CE-rated armor at the shoulders and elbows, a removable thermal liner so it works across a wide temperature range, and ventilation zips for warm-weather riding. The textile construction handles a wider range of conditions than a pure leather jacket, which is exactly what a new rider building one kit needs.
Who it is for: the new rider who wants one jacket that handles spring, summer, and fall, breaks in comfortably, and will not blow the budget. The detail worth knowing is that the removable liner system is what makes this a true all-season piece: liner in for cold mornings, liner out and vents open for hot afternoons, and a waterproof layer underneath for the rain. The honest limitation: like most jackets at this price, it ships with armor at the shoulders and elbows but often only a foam pad where a back protector should go, so budget for a CE Level 2 back insert, which is one of the best small upgrades you can make. Look for the CE EN 17092 abrasion class on any jacket and the CE EN 1621 rating (Level 1 or Level 2) on the armor inside it. For the full breakdown of jacket armor levels and what is worth buying, see my best motorcycle jackets guide.
Joe Rocket Atomic 5.0
Joe Rocket
A long-running budget all-rounder: CE-approved shoulder and elbow armor, a removable waterproof liner, and enough vents to survive...
Check Price on Amazon →Your Gloves: RST Urban Air 3
Your hands hit the ground first in almost every fall, it is pure instinct to put a palm out, which is why gloves come third in the buying order and why I will not ride to the end of the block without them. For a new rider's first pair in warm weather, the RST Urban Air 3 proves you do not have to spend a lot to get real protection. It is a short-cuff summer glove in perforated leather with CE Level 1 certification, a hard knuckle, and palm protection, and the perforations keep your hands livable in the heat once you are moving.
Who it is for: the new rider on a budget who wants a no-drama summer glove that protects properly and will not hurt to replace in a couple of seasons. The insider detail is that perforated leather breathes better than people expect once you are rolling, since airflow over the holes does most of the cooling above 30 miles per hour. The honest limitation: it is useless below the low 50s Fahrenheit, it is not waterproof, and the padding is basic compared to pricier gloves. Within its lane, which is dry warm-weather riding, it earns its keep.
RST Urban Air 3
RST
Summer commuter gloves with good ventilation and CE protection. Short cuff, perforated leather. Work well May-September for UK rid...
Check Price on Amazon →If you would rather buy one glove that leans a little more all-rounder, the Alpinestars SMX-1 Air V2 is the step up: a CE EN 13594 certified short-cuff glove with a vented leather-and-mesh construction, a hard knuckle, and reinforced palm sliders, with fingertips that work on a phone screen. It costs a bit more than the Urban Air 3 but breathes hard at speed and feels more refined on a long day. Either one is a sound first glove. Whatever you choose, make sure it carries a genuine CE EN 13594 rating, not just a hard plastic knuckle glued onto a fashion glove.
Alpinestars SMX-1 Air V2
Alpinestars
A CE-certified short-cuff summer glove that breathes hard without giving up protection. Ventilated leather and mesh, a hard knuckl...
Check Price on Amazon →Your Boots: Alpinestars Faster-3
Ask any rider who has gone down at low speed what got hurt, and a startling number will point at an ankle. Feet and ankles are pinned between the bike and the road, and ordinary sneakers do nothing when a heavy machine lands on them. The thing that stops a lot of new riders from wearing real boots is not wanting to clomp around all day in stiff race boots, and the Alpinestars Faster-3 solves exactly that. It looks like a slightly chunky sneaker, but it carries CE EN 13634 certification with reinforced ankle, heel, and toe protection and a stiffened sole that resists twisting. Off the bike, it walks like a normal shoe.
Who it is for: the new rider and commuter who wants real foot protection without committing to a tall, stiff touring or race boot. The detail worth knowing is that the stiffened sole is doing quiet work even when nothing goes wrong, since it stops the boot folding around the peg and resists the twisting forces that break ankles in a drop. The honest limitation: a low sneaker-style boot gives less ankle coverage than a tall touring or sport boot, and it is not waterproof, so it is a fair-weather and commuting choice rather than an all-conditions one. For most new riders, that is exactly the right tradeoff. The deeper breakdown of boot styles lives in my best motorcycle boots guide.
Alpinestars Faster-3 Rideknit
Alpinestars
A riding shoe that passes for a sneaker off the bike but hides real protection: CE EN 13634 certification, reinforced ankle, heel ...
Check Price on Amazon →Your Riding Pants: RST Pro Series Textile Trousers
Legs are the piece most new riders phase in last, often after a near-miss makes them realize jeans do nothing on asphalt. The RST Pro Series textile trousers are a sensible first pair of dedicated riding pants. They are CE-armored at the hips and knees, made from abrasion-resistant textile, and designed to layer over or replace ordinary trousers without looking like full race leathers. For a new rider, armored riding pants close the last big gap in an ATGATT kit, since your hips and knees are right there in the impact zone in a slide.
Who it is for: the new rider ready to complete the kit and stop riding in plain jeans, who wants leg protection that is practical for commuting and weekend riding. The detail to appreciate is that CE armor at the hips and knees is doing the same job as the armor in your jacket, spreading and absorbing impact at the joints most likely to hit first. The honest limitation: dedicated riding pants are warmer than jeans and less casual to walk around in, which is why people leave them for last, but they are the piece that turns a partial kit into a complete one. Confirm the CE EN 17092 abrasion class and the CE EN 1621 armor rating before you buy, the same standards that apply to your jacket.
RST Pro Series Textile Trousers
RST
All-weather textile trousers to match RST Pro Series jacket. Waterproof membrane, removable thermal liner, CE knee armour. Handle ...
Check Price on Amazon →Not sure which pieces to prioritize for the kind of riding you actually do? The rider type quiz sorts it out in about a minute based on how, where, and when you ride.
What Each Piece Actually Protects
It helps to understand the specific job each piece does, because that is what justifies its place in the kit. Your helmet protects your skull and brain from impact, and a full-face lid adds chin and jaw protection that open and modular designs leave more exposed. Your jacket protects your torso, spine, shoulders, and elbows, with CE armor at the joints and an abrasion-resistant shell that keeps the road from grinding through to skin. Your gloves protect your hands and wrists, with a hard knuckle that absorbs direct impact and a palm slider that lets your hand skate across pavement instead of catching and twisting your wrist into a break. Your boots protect your feet and ankles, with reinforced toe, heel, and ankle structure and a stiffened sole that resists the crush and twist forces a bike puts on a foot. Your riding pants protect your hips, knees, and thighs with armor and abrasion-resistant fabric. Cover all five and you have closed every major gap, which is what ATGATT actually means in practice.
How a New Rider Spends a Limited Budget Wisely
Here is the honest guidance on stretching limited money across a full kit. First, never compromise on the helmet. The certification is non-negotiable and the i10 proves you do not have to overspend to get it, so this is the one place I would not cut. Second, buy certified over branded. A budget CE-rated glove and a premium CE-rated glove have both passed the same baseline test, so above the certification line you are mostly paying for comfort, durability, and refinement, not a higher safety ceiling. That means a new rider can build an entirely certified kit at the budget and mid-range tiers without dropping below the safety floor. Third, buy in the right order so that if you have to split purchases across a couple of paychecks, you always have your highest-priority protection first. Fourth, add a CE Level 2 back protector to the jacket as soon as you can, since it is one of the cheapest upgrades that meaningfully raises your protection. Fifth, do not buy gear you do not need yet, like a dedicated track suit or a winter touring jacket, before you know what kind of riding you settle into. The goal is a complete, certified, comfortable kit at a sensible total, not the most expensive version of every piece.
Common Questions New Riders Ask
A few questions come up again and again from riders building a first kit, so here are honest answers. Do I really need riding pants if I wear thick jeans? Ordinary jeans tear through in a fraction of a second on asphalt and have no armor at the hips and knees, so they are far weaker than people assume, and dedicated riding jeans or armored textile pants are the real answer once the first four pieces are sorted. Should I buy a modular helmet so I can flip it up at lights? Modular helmets are convenient, but the hinge mechanism adds weight and a potential weak point at the chin bar, and for a first helmet a full-face lid gives the most protection for the money, which is why the i10 sits at the start of this kit. Can I start with a mesh jacket if I live somewhere hot? You can, but a new rider in a hot climate is often better served by an all-season jacket with the liner removed and the vents open, because it covers more of the year and rides through the occasional cool morning or rain shower without leaving you exposed. How long does gear last? A well-made helmet is generally considered good for around five years from the date of manufacture, or immediately after any impact, while jackets, gloves, and boots last for years of normal riding but should be retired once the armor cracks, the abrasion shell wears thin, or a crash compromises them. What about secondhand gear? Used jackets, gloves, and boots can be fine if you inspect the armor and stitching closely, but a used helmet is the one piece to avoid, since you cannot verify whether it has taken a hit that quietly compromised the shell or liner.
Caring for a First Kit So It Lasts
Gear is an investment, and a little care keeps it protecting you for years rather than seasons. My motorcycle gear care guide covers how to clean and maintain every piece. Let your jacket and gloves dry fully after a wet ride before storing them, since trapped moisture breaks down liners and leaves leather stiff and cracked. Wash a textile jacket according to the maker's instructions rather than throwing it in a hot wash that can damage the waterproof membrane and the laminated panels. Treat leather gloves and boots with a suitable conditioner occasionally so they stay supple, which both extends their life and keeps them comfortable. Reproof a waterproof jacket with a wash-in or spray-on treatment when water stops beading on the surface, since the waterproofing wears down with use and a refresh restores it. Store your helmet somewhere cool and out of direct sunlight, because heat and UV degrade the protective foam liner over time, and never hang it by the chin strap or drop it, since impacts can damage the structure even when nothing visible breaks. Check the armor in your jacket and pants periodically to confirm it has not shifted out of position or hardened, and replace any piece after a crash even if it looks intact, because the protective materials are designed to absorb a single impact and may not perform the same a second time. A kit that is looked after stays a kit you trust.
What to Avoid
Avoid the single biggest new-rider mistake, which is riding in street clothes because the gear has not arrived yet or because it is just a quick trip. The quick trips close to home are statistically where new riders crash most, so "just this once" is exactly the wrong instinct. If the gear is not here yet, the ride waits.
Be wary of uncertified gear dressed up to look protective. A jacket with foam shoulder pads and no CE EN 17092 class, a glove with a chunky plastic knuckle but no CE EN 13594 mark, or boots sold on "moto styling" with no CE EN 13634 rating are fashion items, not safety equipment. If a listing talks about looks and "premium materials" but never names the relevant standard, assume the protection has not been tested.
Skip the half helmet and the novelty lid for a first helmet. A skull cap or an unbranded helmet without DOT certification is not protecting your head the way a certified full-face lid does, and a new rider has no business starting on anything less. Avoid fingerless gloves, which expose your fingertips to abrasion and rarely carry real knuckle armor. And avoid buying a used helmet, since you cannot verify whether it has taken an impact that compromised the shell or liner, and the protective structure degrades after a crash even when it looks fine.
How to Choose: What Actually Matters
Get the helmet fit right above everything else. A helmet that does not fit does not protect, no matter how good its certification. It should be snug all the way around with no pressure points, the cheek pads should hug your face, and it should not rotate or slide when you shake your head. A new helmet will feel tighter than you expect and break in slightly, so a lid that is loose out of the box is too big. Measure your head circumference about an inch above your eyebrows and check it against the maker's chart, and remember a helmet is the one piece where fit and protection are the same thing.
Buy for the certification, not the brand. DOT is the legal minimum for helmets in the US, Snell M2020 is a tougher voluntary standard worth seeking out, CE EN 17092 covers jacket and pant abrasion, CE EN 1621 covers armor at Level 1 and Level 2, CE EN 13594 covers gloves, and CE EN 13634 covers boots. A piece with a real rating has been tested against the forces that actually hurt riders; one without it is a guess.
Match the gear to your real riding, not your aspirational riding. A new rider who commutes in a warm climate needs a vented jacket and summer gloves, not a heavy winter touring setup. Buy for the riding you are doing now and phase in seasonal or specialist pieces as you learn what you actually do. Buying the wrong gear for your riding is a quiet way to waste budget you could have spent better.
Prioritize comfort, because the best gear is the gear you actually wear. A jacket that is too hot, gloves that are too stiff, or boots that hurt to walk in get left at home, and gear left at home protects nothing. When two pieces both hit the certification you need, pick the one you will actually pull on every single ride.
Plan for layering rather than buying a jacket for every season at once. An all-season jacket with a removable liner, like the Atomic 5.0, covers far more of the year than a single-purpose jacket, and it lets a new rider get going with one piece instead of three. Add base layers and a rain shell as you go.
A note on safety: This guide is informational. I am not a certified safety professional. Certification standards and product specifications change over time, so always confirm the current DOT, Snell, and CE ratings on the manufacturer's documentation and check the fit before you buy. No gear eliminates risk; riding always carries it.
A first kit is a system, and every piece works with the others. Anchor it with a certified lid from my best motorcycle helmets guide, build out the torso with a CE-armored jacket from the best motorcycle jackets guide, and add the gloves and boots that protect the parts that touch down first from my best motorcycle gloves guide and best motorcycle boots guide. Cover head, torso, hands, feet, and legs and you have the core of a setup that lets you walk away from the kind of crash that wrecks riders in sneakers and a hoodie. Still not sure where to start? The rider type quiz will point you the right way.
What I'd Buy Today
If I were kitting out a new rider this week, I would start with the HJC i10. It is a full-face helmet carrying both DOT and Snell M2020 certification at a budget price, which is the most important purchase a new rider makes and the one place I would never cut a corner. Get the i10 on Amazon, then add the Joe Rocket Atomic 5.0 jacket, the RST Urban Air 3 gloves, the Alpinestars Faster-3 boots, and the RST Pro Series trousers in that order, and you have a complete, certified ATGATT kit at a sensible total.
Buy the helmet first, certify every piece, and gear up for every single ride, even the short ones. The riders who walk away from crashes are the ones who wore the gear before they thought they needed it. Still figuring out what your riding actually demands? Run the rider type quiz and let it point you the right way.
As an Amazon Associate, we earn from qualifying purchases.
Frequently Asked Questions
Related Guides
Find Your Perfect Gear
Expert guides for helmets, jackets, gloves, boots, and more. Safety-focused recommendations for UK and US riders.
Browse All Guides